Does Csr Need to Be Converted Into Pem Format for Uploadding to Certs Directory
This document describes the process to generate certificates that have to be uploaded with every fresh installation of Secure Console Individual Cloud or to renew the installed Certificate services.
Requirements
The information in this document is based on these software and hardware versions:
- Windows Server 2008
- CentOS seven/8
- Secure Panel Virtual Private Deject 3.0.2 (Onwards)
- OpenSSL one.one.1
Components Used
Cisco recommends that you have knowledge of these topics:
- Windows Server 2008 (Onwards)
- Secure Console Individual Cloud installation
- Public Key Infrastructure
- OpenSSL
- Linux CLI
The data in this document was created from the devices in a specific lab environment. All of the devices used in this document started with a cleared (default) configuration. If your network is live, ensure that you lot understand the potential impact of any command.
With the introduction of Secure Console Individual Cloud 3.Ten, hostnames and certificate/key pairs are required for all of the following services:
- Administration Portal
- Hallmark (new in Private Deject 3.X)
- Secure Console
- Disposition Server
- Disposition Server - Extended Protocol
- Disposition Update Service
- Firepower Management Center
In this document is discussed a quick fashion to generate and upload the required certificates. You lot can tweak each of the parameters, including the hashing algorithm, key size, and others, as per your system's policy, and your mechanism of generating these certificates might not friction match with what is detailed here.
Warning: The procedure mentioned below tin vary as per your CA server configuration. It is expected that the CA server of your choice is already provisioned and the configuration of the same has been completed. The post-obit technote just describes an example of generating the certificates and Cisco TAC is non involved in troubleshooting issues related to document generation and/or CA server issues of whatever kind.
Generate Certificates on Window Server
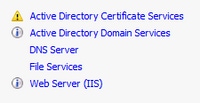
Ensure that the following roles are installed and configured on your Windows Server.
- Active Directory Document Services
- Certification Authority
- Certification Authorisation Spider web Enrollment
- Online Responder
- Certificate Enrollment Web Service
- Certificate Enrollment Policy Web Service
- Active Directory Domain Services
- DNS Servers
- Web Server (IIS)
Generate a Certificate Signing Request (CSR)
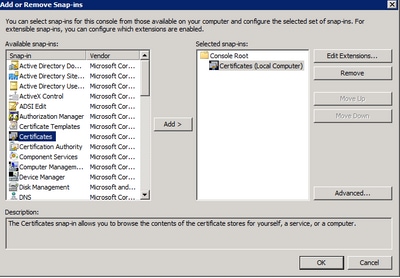
Step 1. Navigate to MMC panel, and add together the Certificates snap-in for your figurer account as shown in the image here.
Step 2. Drill downwardly Certificates (Local Figurer) > Personal > Certificates.
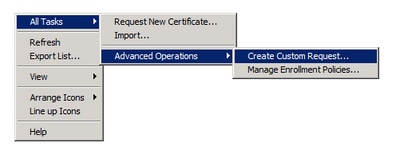
Stride iii. Right-click on the empty space and selectAll Tasks > Advanced Operations > Create Custom Request.
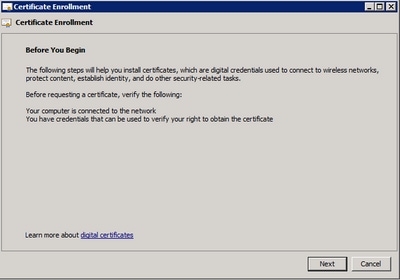
Step 4. SelectNext at the Enrollment window.
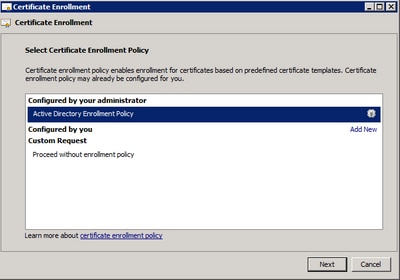
Step 5. Select your certificate enrollment policy and selectNext.
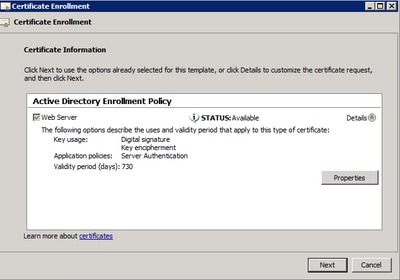
Footstep half-dozen. Choose the template asWeb Server and selectNext.

Footstep vii. If your "Web Server" template has been configured correctly and is available for enrollment, the status Bachelor is displayed. SelectDetails to expand Properties.
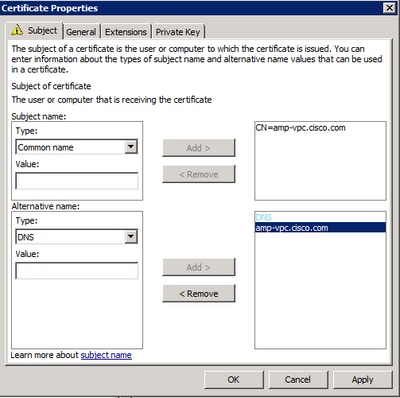
Pace eight. At a minimum, add the CN and DNS attributes. The rest of the attributes can be added as per your security requirements.
Pace ix. Optionally, give a Friendly Name under the General tab.
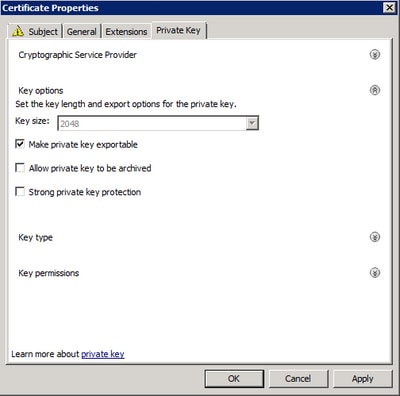
Step x. Select on the Individual Central tab and ensure that yous're enabling Make private key exportable under the Key Options section.
Step xi. Finally, select on OK. This must lead you to the Document Enrollment dialog from where you lot can selectNext.
Stride 12. Scan to a location to save the .req file which is submitted to the CA server for signing.
Submitting the CSR to the CA and generating the document
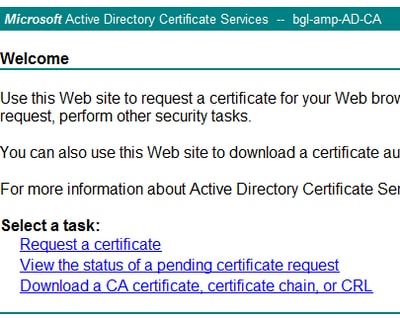
Step 1. Navigate to your MS AD Certificate Services Web Page every bit below and selectRequest a Document.
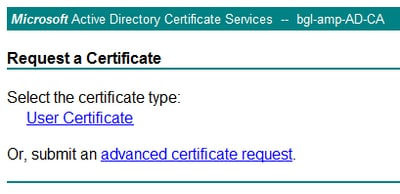
Step ii. Select on the advanced certificate request link.
Step 3. Select on Submit a certificate request by using a base of operations-64-encoded CMC or PKCS #x file, or submit a renewal request by using a base-64-encoded PKCS #vii file.
Pace 4. Open the contents of the previously saved .req file (CSR) via Notepad. Copy the contents and paste information technology here. Ensure that the Certificate Template is selected as Web Server

Step v. Finally, selectSubmit.
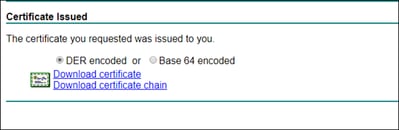
Footstep 6. At this point, y'all must be able to Download the document, as shown in the prototype.
Exporting the Private Key and converting to PEM format
Step i. Install the certificate into your Certificate Store by opening the .cer file and selectInstall Certificate.
Stride two. Navigate to the MMC snap-in that was selected earlier.
Pace 3. Navigate to the store where the document was installed.
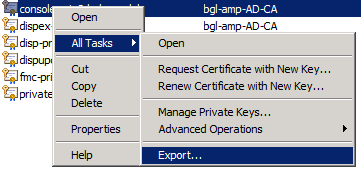
Step 4. Right-click the correct document, select All Tasks > Export.
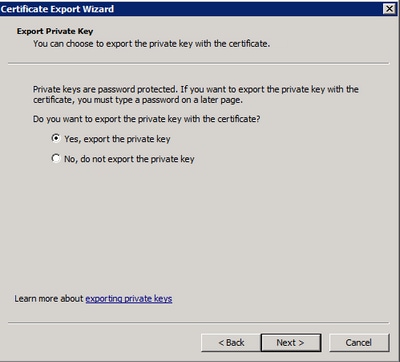
Footstep v. At the Certificate Export Magician, ostend to export the private key, as shown in the epitome.
Footstep 6. Enter a countersign and selectNext to salvage the private fundamental on your deejay.
Step seven. This saves the private central in .PFX format, however, this needs to be converted to .PEM format to apply this with Secure Endpoint Private Deject.
Pace 8. Install OpenSSL libraries from here:https://wiki.openssl.org/alphabetize.php/Binaries.
Step 9. Open a command prompt window and change to the directory where you installed OpenSSL.
Step 10. Run the post-obit command to extract the individual key and save it to a new file: (If your PFX file is not in the aforementioned path as where the OpenSSL library is stored, you accept to specify the exact path along with the filename)
openssl pkcs12 -in yourpfxfile.pfx -nocerts -out privatekey.pem -nodes
Footstep eleven. Now run the following command to also excerpt the public cert and salve it to a new file:
openssl pkcs12 -in yourpfxfile.pfx -nokeys -out publiccert.pem -nodes
Generate Certificate on Linux Server (Strict SSL check DISABLED)
Ensure that the Linux Server that you're trying to generate the required certificates has the OpenSSL 1.1.1 libraries installed. Verifying if this and the process listed below tinvary from the Linux distribution that you're running. This portion has been documented, every bit washed on a CentOS 8.4 Server.
Generate Self Signed RootCA
Step 1. Generate the Private Cardinal for Root CA document.
openssl genrsa -out <YourRootCAName.key> 4096 Pace 2. Generate the CA document.
          openssl req \
          -subj '/CN=<YourRootCAName>/C=U.s.a./OU=<YourDepartmentName>/O=<YourCompanyName>' \
          -addext "extendedKeyUsage = serverAuth, clientAuth" \
          -outform pem -out <YourRootCAName.pem> \
          -key <YourRootCAName.central> -new -x509 \
          -days "1000"
Generate a document for each service
Create the certificate for Authentication, Panel, Disposition, Disposition-Extended, Update server, Firepower Management Center(FMC) service as per the DNS proper name entry. You demand to repeat the below document generate process for each service (Authentication, Console etc.).
Generate Private key
openssl genrsa -out <YourServiceName.key> 4096 Supersede the <YourServiceName.primal> with the new Cardinal filename to be created every bit Auth-Cert.key
Generate CSR
          openssl req -new \
          -subj '/CN=<YourServiceName>/C=US/OU=<YourDeptName>/O=<YourCompanyName>' \
          -key <YourServiceName.key> -out <YourServiceName.csr>
Replace the <YourServiceName.key> with the electric current (or new) certificate Cardinal file such as Auth-Cert.central
Replace the <YourServiceName.csr> with CSR filename to be created such as Auth-Cert.crt
Generate Document
          openssl x509 -req \
          -in <YourServiceName.csr> -CA <YourRootCAName.pem> \
          -CAkey <YourRootCAName.key> -CAcreateserial -out <YourServiceName.crt>  \
          -days 1000 -sha256
Replace the <YourServiceName.csr>with bodily (or new) certificate CSR such every bit Auth-Cert.csr
Replace the <YourRootCAName.pem> with actual (or new) PEM filename equally RootCAName.pem
Replace the <YourServiceName.primal> with the current (or new) document KEY file such as Auth-Cert.key
Supercede the <YourServiceName.crt> with filename to be created such as Auth-Cert.crt
Generate Document on Linux Server (Strict SSL cheque ENABLED)
Generate Self Signed RootCA
Step 1. Generate the Private Fundamental for Root CA certificate.
openssl genrsa -out <YourRootCAName.primal> 4096 Pace 2. Generate the CA certificate.
          openssl req \
          -subj '/CN=<YourRootCAName>/C=Us/OU=<YourDepartmentName>/O=<YourCompanyName>' \
          -outform pem -out <YourRootCAName.pem> \
          -primal <YourRootCAName.key> -new -x509 \
          -days "1000"
Generate a certificate for each service
Create the certificate for Authentication, Console, Disposition, Disposition-Extended, Update server, Firepower Management Center(FMC) service as per the DNS name entry. You need to repeat the below certificate generate process for each service (Authentication, Console etc.).

Create an Extensions Configuration file and salve it (extensions.cnf)
          [v3_ca]
          basicConstraints = CA:Imitation
          keyUsage = disquisitional, digitalSignature, keyEncipherment
          extendedKeyUsage = critical, serverAuth, clientAuth
Generate Private cardinal
openssl genrsa -out <YourServiceName.key> 4096 Replace the <YourServiceName.key> with a new KEY filename to be created as Auth-Cert.central
Generate CSR
          openssl req -new \
          -central <YourServiceName.fundamental> \
          -subj '/CN=<YourServiceName>/C=Usa/OU=<YourDeptName>/O=<YourCompanyName>' \
          -out <YourServiceName.csr>
Replace the <YourServiceName.primal> with the current (or new) document KEY such as Auth-Cert.primal
Replace the <YourServiceName.csr> with the current (or new) document CSR such as Auth-Cert.csr
Generate Certificate
          openssl x509 -req -in <YourServiceName.csr> \
          -CA <YourRootCAName.pem> -CAkey <YourRootCAName.fundamental> \
          -CAcreateserial -out <YourServiceName.crt> \
          -extensions v3_ca -extfile extensions.cnf \
          -days 365 -sha256
Replace the <YourServiceName.csr> with current (or new) certificate CSR such as Auth-Cert.csr
Replace the <YourRootCAName.pem> with current (or new) PEM filename as RootCAName.pem
Supercede the <YourServiceName.central> with current (or new) certificate KEY file such as Auth-Cert.cardinal
Replace the <YourServiceName.crt> with filename to be created such as Auth-Cert.crt
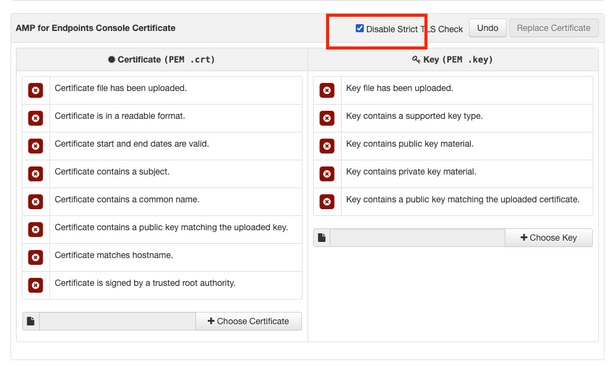
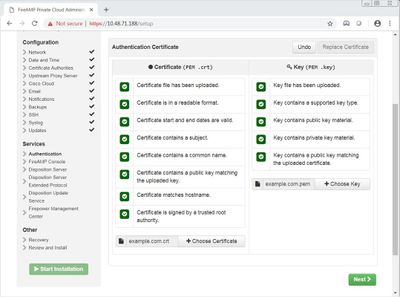
Footstep 1. In one case the certificates are generated from whatsoever of the above methods, upload the corresponding certificate for each of the services. If they have been generated correctly, all the checkmarks are enabled as seen in the prototype here.
There is currently no verification procedure bachelor for this configuration.
There is currently no specific troubleshooting information available for this configuration.
Source: https://www.cisco.com/c/en/us/support/docs/security/amp-virtual-private-cloud-appliance/214326-how-to-generate-and-add-certificates-tha.html
0 Response to "Does Csr Need to Be Converted Into Pem Format for Uploadding to Certs Directory"
Post a Comment